Nokia 5G21 Gateway

Find technical details, tutorial links, and other information about your Nokia 5G21 gateway.

About the Gateway

For more gateway steps, such as instructions on how to install your SIM or reset your gateway, check out our Tutorials. 

Front
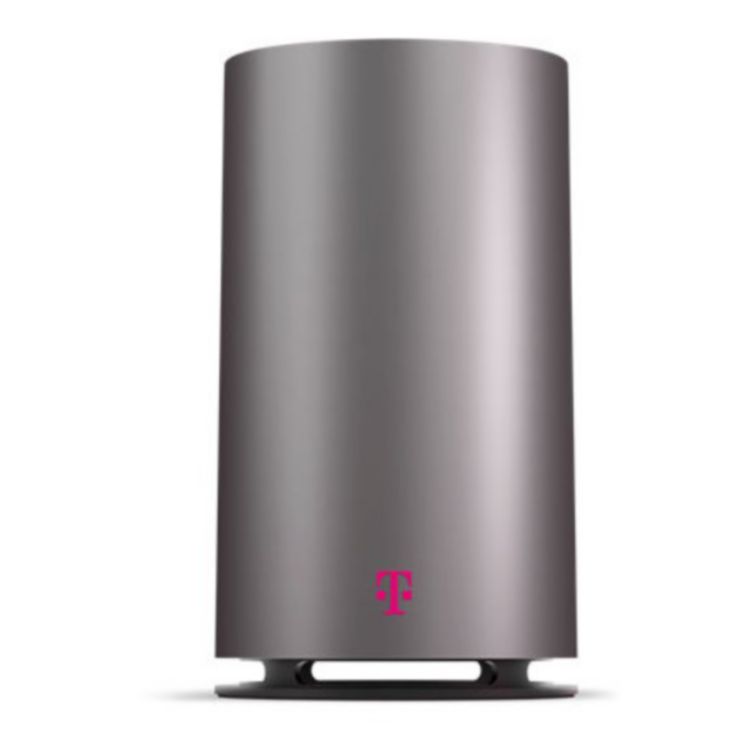
Front view of the Sagemcom Fast 5688W gateway

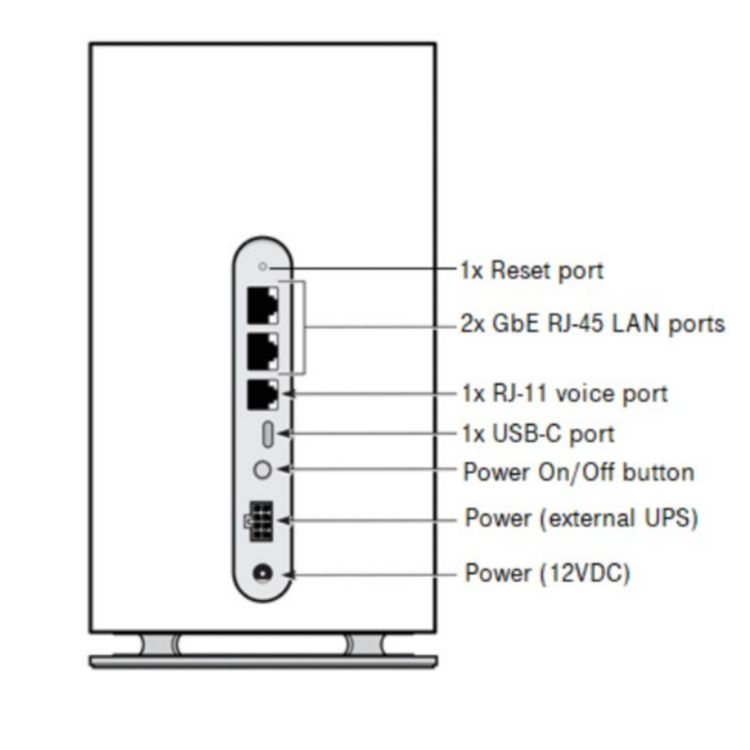
Back

An image of the back of the Sagemcom gateway with arrows pointing to it's parts. In the middle of the gateway is the Label. Below that is the Data Port. Below the Data Port are two Ethernet Ports. Below the Ethernet Ports is the Power Button. Below the Power Button is the Power Port.

Reading the gateway label

The label on the back of your gateway includes information about the device and network including the default Wi-Fi network name and Wi-Fi password.
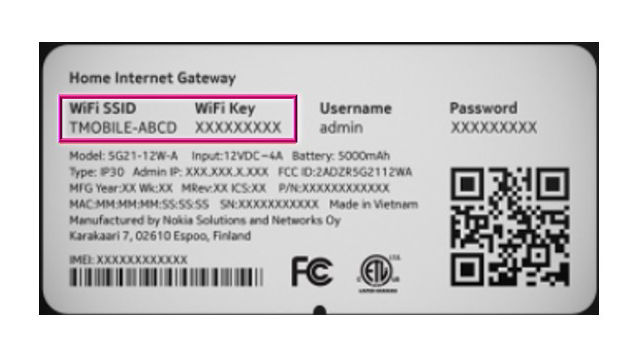
Nokia 5G21 Gateway Label with an outline around the Wi-Fi SSID and Wi-Fi password

LCD Screen

Press the left or right arrow ( < or > ) on the LCD panel with your finger to move between screens. The illuminated dot on the bottom of the screen indicates where you are in the screen sequence.

    • The gateway displays up to five bars, indicating signal strength. 
    • The number of bars shown represents the strength of the gateway's current connection to the cellular network.
    • An 'X' indicates the gateway is not connected to the cellular network.
    • The number displayed indicates the number of devices currently connected to the gateway (including wireless and wired devices).
    • Use the T-Life app to see and manage each connected device.
  • The Nokia 5G Gateway supports both English and Spanish on the LCD screen. To adjust this setting:

    1. From the Settings screen, select Languages.
    2. Choose English or Español
    3. Select the checkmark to set the language.
  • The gateway alerts provide device-specific information to which you may need to respond. Choose the alert severity to view specific alerts. 

  • The Messages screen allows you to view the message contents by pressing < and > to scroll between messages. 

    To delete a message:

    1. Press O (OK) on the panel to select VIEW MESSAGES and view unread messages.
    2. Select NEXT and read next message.
    3. Select DONE when you have read all messages.
    4. Select DELETE to delete a message.
    5. When prompted with a message asking you to confirm deletion, select YES to confirm.

    You can block messages to your gateway through your T-Mobile account. See Message Blocking for details.

  • Notifications can appear at any time during gateway operation. Some are in response to an action you have taken, and others are related to network connection. 

Tech Specs

  • Battery
    • Battery size: 5000 mAh
    • Disabled
  • AC Adapter
    • 100V - 240V
    • 12V / 2A
  • Dimensions (W x H)
    • 4.72 x 8.50 in (120mm x 216mm)
  • Operating temperature range
    • -5° – 45° C (23° F – 113° F)
  • Connections
    • Dual Band Wi-Fi 6 (802.11 ax)
    • WPA2/WPA3 Wi-Fi Security
    • Ethernet plugs 2xRJ-45
    • Tel (RJ-11) and USB-C ports (not currently in use)
    • Maximum recommended devices: 64
  • Network
    • 5G bands: N41, N71
    • 4G LTE bands: B2, B4, B5, B12, B71, B66

Firmware Updates

  • Firmware updates are pushed out automatically when available. They can't be manually requested.
  • They're sent out in phases over a few weeks, so not all users get the update at the same time.
  • Updates happen between 1 am and 3 am PST; make sure your gateway is turned on during this time to get the update.
  • Do not restart the gateway when it’s updating. The gateway will automatically restart once the update is complete.

Firmware versions, fixes, and features

  • 1.2303.00.0033
    • Display service notifications from T-Mobile on the gateway LCD
    • Stability improvements
  • 1.2302.00.0082
    • Internet Line Number availability on the Gateway LCD
  • 1.2204.01.0101
    • Security and stability improvements
    • Battery disabled
  • 1.2201.00.0328
    • Stability improvements
  • 1.2201.00.324
    • WPA2/WPA3 default Wi-Fi security setting
    • Security and stability improvements
  • 1.2201.00.0313
    • New LCD notification for RF failure alert on Main Display
    • Ability to configure hidden or visible SSID broadcasting using the Internet App.
    • Stability improvements
  • 1.2104.00.0286
    • Stability improvements
  • 1.2103.00.0338
    • Security and stability improvements
    • Deep factory reset can be triggered by pressing the reset button for more than 30 seconds
  • 1.2101.00.1609
    • Improves known issues: Cisco AnyConnect VPN; GlobalProtect VPN connection issues; Degraded experience
    • Includes all fixes from previous versions
  • 1.2003.03.0178
    • Resolves VPN tunnel protocols IKEv2/L2TP/IPSec
    • Xbox Party Chat
    • Linelink connection issues
    • Wi-Fi Calling and UPNP
  • 1.2003.03.0143 / 1.2003.03.0168
    • Release version

Web Gateway User Interface (GUI)

You can use the Web GUI to view and update gateway settings from a desktop computer. For mobile devices and tablets, use the T-Life app to view and change gateway settings. 

Access the Web GUI

You must disconnect active VPN sessions to connect and log in. 

  1. Power on your gateway and connect to it over Ethernet or Wi-Fi.
  2. Open a web browser and visit http://192.168.12.1
  3. Log in with your username and password. To find the default username and password, check the label on the underside of the gateway.
  4. Once you have logged in, you will see an Overview screen that contains Network Overview and Gateway Information.
    1. Access the Web GUI and choose Network > Wi-Fi Networks.
    2. Choose the 2.4 GHz or 5 GHz network to adjust the following options:
      • SSID Name (Wi-Fi Network Name)
      • Encryption Mode
      • WPA Version
      • WPA Key

    Guest network

    The device doesn't have a dedicated guest network, but you can manually configure one of the available SSIDs to be a guest network.

    1. Access the Web GUI and choose Network > Wi-Fi Networks on the left-hand side.
    2. Select the 2.4 GHz or 5 GHz network. Each frequency must be set up separately.
    3. Choose Select SSID to configure and choose an unused SSID, like SSID2.
    4. Enter a new SSID / Wi-Fi Network Name that's different from other SSIDs you have configured.
    5. Make sure to enable SSID and Broadcast.
    6. Adjust the following settings as desired, then select Save Changes.
      • Total clients (128 recommended)
      • Encryption Mode 
      • WPA Version
      • WPA Key (Wi-Fi Password)
  • Text messages sent to the device will display on the LCD screen, not in the user interface. You can't send messages from this device.

    • Select < and > to scroll between messages.
    • Select the trash icon to delete a message, then choose Yes to confirm.
  • Reboot

    Rebooting the Gateway cycles power and keeps any changes you've made to settings. You can reboot in the Web GUI settings, or by pressing the Power button to turn the device off and back on again. To reboot using the Web GUI:

    1. From the System tab, select Reboot.
    2. You will receive a warning that the network will be offline while rebooting. Select Yes to continue.

    Factory Reset

    A factory reset restores all settings and configuration changes to factory default. You can reset the gateway by inserting a paperclip in the Reset port on the back of the device for 5-10 seconds or using the Reset button in the Web GUI. To perform a factory reset in the Web GUI:

    To Reset with the gateway button

    1. Insert a paperclip in the Reset port on the back of the device.
    2. Press the button inside until the LCD screen shows Release button to restart.
    3. Remove the paperclip and wait for the device to restart.

    To Reset through settings

    1. From the System tab, choose Factory Reset.
    2. You will receive a warning that network-related data will be deleted. Select Yes to continue.
    3. The LCD screen on the gateway will display "Factory reset is ongoing". Once complete, you will be prompted to download the T-Life app. 
    4. On the LCD screen, swipe left to the Connection screen.
    5. Select Refresh on the Web GUI screen.
  • Change language

    Select the arrow beside the language in the bottom-left corner and choose either English or Español.

    Change User Interface Password

    1. From the System tab, select Change Password.
    2. Enter the current password (the default password is located on the bottom of the gateway).
    3. Enter and confirm the new password.
    4. Select Update Password.

    Gateway information

    1. On the left side, choose Network. Then select the Gateway icon.
    2. View the following information:
      • Gateway name
      • Serial number
      • Hardware version
      • Software version
      • Running time

    Network Status

    1. On the left side, select Status.
    2. View the following information:
      • Data Usage
      • SIM
        • IMSI
        • ICCID
      • Cellular Network
        • Primary Signal
        • Secondary Signal
        • Access Point
        • Total Download
        • Total Upload
      • Ethernet
        • IP Address
        • Subnet Mask
        • Received Data
        • Sent Data
      • Wi-Fi
        • 2.4GHz
        • 5GHz Low Frequency
        • 5GHz High Frequency
        • Received Data
        • Sent Data

    Statistics

    Choose Statistics on the left side to view information on data sent over your LAN, Cellular, and WLAN connections.

Need help?

Our Troubleshooting guides can help fix the most common T-Mobile Internet issues, right from the comfort of your home!

Looking for something else?

   Survey Link